Transform Your Outdoor Space Without Spending a Fortune
Your backyard or patio does not need a designer budget to feel like a retreat. With a little creativity, some weekend effort, and a handful of affordable materials, you can turn even the most overlooked outdoor corner into a space you actually want to spend time in. These ideas are made for real homes, real budgets, and real people who love beautiful spaces.
1. Create a Cozy String Light Canopy
There is something almost magical about what a strand of warm Edison bulb string lights can do to an outdoor space at dusk. The key is not just hanging them haphazardly but creating a deliberate canopy effect — draping them from a central anchor point above a seating area outward to fence posts, wooden stakes, or hooks screwed into a pergola frame. This creates a tent-like ceiling of light that makes even a plain concrete patio feel intimate and curated. The warm amber glow softens everything underneath it and invites people to linger longer than they planned.

To make the look feel intentional rather than improvised, pair your string lights with natural textures underneath. Think a simple outdoor rug in jute or a faded stripe pattern, a couple of mismatched wooden stools, and a low side table. Terracotta pots with trailing greenery placed at the base of your light poles tie the whole composition to the earth and keep things feeling grounded. Choose bulb spacing of around six inches for a denser, moodier effect, and always opt for warm white over cool white — it photographs better and feels far more welcoming in person.
Do not underestimate the power of layering your lighting either. String lights work best when they are not the only source of illumination. Add a few solar lanterns at ground level or flameless pillar candles on a low coffee table to create light at multiple heights. This multi-level approach adds dimension and depth to the space after dark, making it feel designed rather than decorated. The whole setup can come together for well under fifty dollars if you shop smart.
2. Build a Budget-Friendly Raised Garden Bed from Reclaimed Wood
Raised garden beds are one of the most functional and visually satisfying DIY projects you can take on outdoors, and they do not have to cost a lot to look impressive. Reclaimed wood from pallets, old fence boards, or even discarded lumber from a neighborhood renovation gives your beds instant character and a weathered, lived-in charm that freshly stained new wood simply cannot replicate. The natural graying and knot patterns of aged wood look beautiful against the green of growing plants and fit seamlessly into a cottage-style or rustic backyard aesthetic.
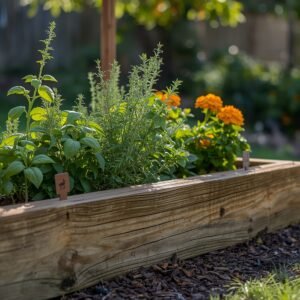
Stack your boards two or three levels high for a more dramatic look and to give roots more growing room. Fill the base with a mix of topsoil and compost, and then play with what you plant for visual interest. Trailing herbs like thyme and rosemary spill beautifully over the edges. Tall basil adds vertical interest. Bright marigolds tucked between vegetables not only look cheerful but also naturally deter pests. The planting itself becomes part of the decor — a living, ever-changing element of your outdoor design that evolves across the seasons.
Position your raised bed where it can be seen from a window or patio seating area so it becomes a focal point you enjoy even from indoors. Add a small hand-lettered plant marker made from a painted stone or a simple wooden stake for a personal, Pinterest-worthy touch. Edge the surrounding area with gravel or bark mulch to define the space and keep things looking tidy without requiring ongoing upkeep. This is one of those projects that rewards you daily, whether you are harvesting herbs or simply looking out at something beautiful and alive.
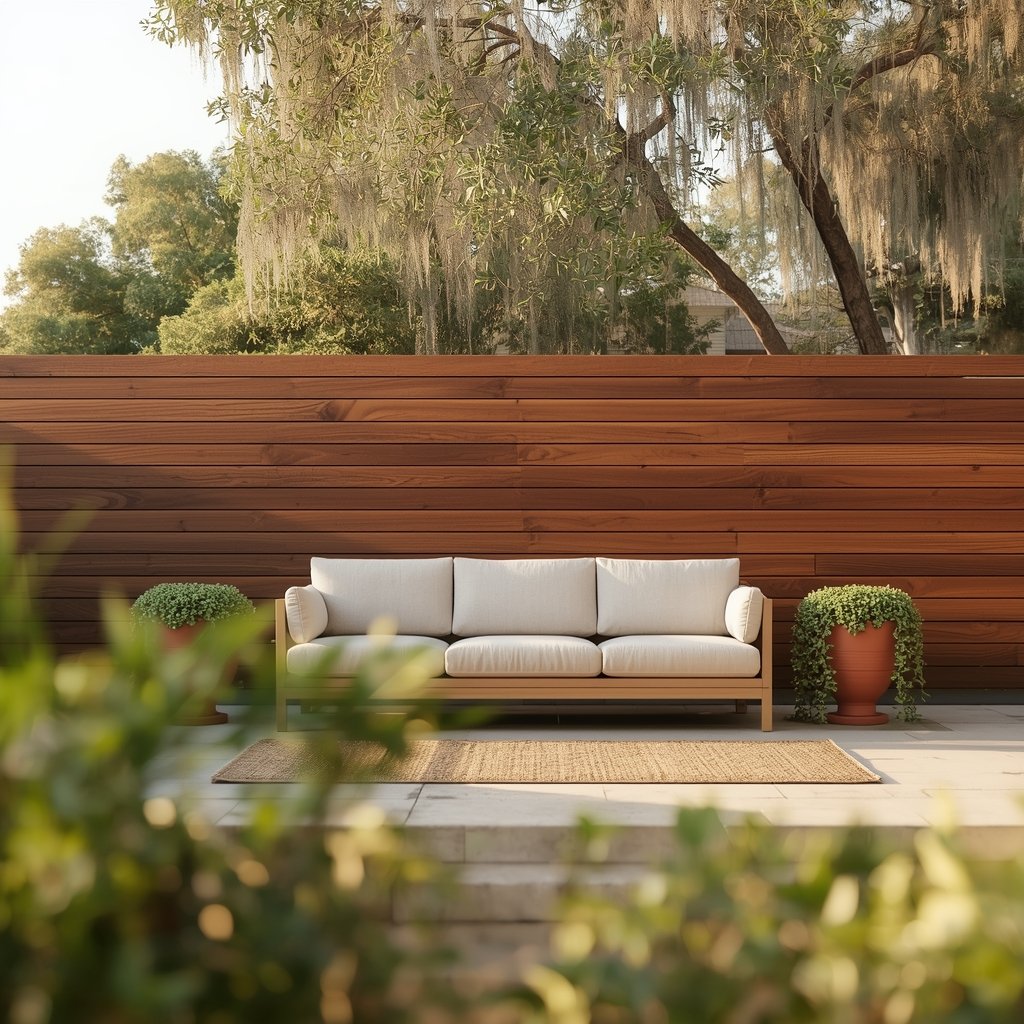
3. Design a Simple Pallet Sofa with Outdoor Cushions
Wooden pallets have become a staple of budget outdoor furniture design for good reason — they are sturdy, free or nearly free, and incredibly versatile. To build a pallet sofa that looks intentional rather than improvised, start by sanding your pallets smooth to avoid splinters and then either paint them in a clean, solid color or seal the natural wood with an outdoor-grade clear coat. White and charcoal are timeless choices. Deep forest green or soft black lean more modern and moody. The color you choose will set the tone for your entire outdoor palette, so think about it the way you would a major furniture purchase.

The cushions are where you truly make the piece. Choose outdoor-rated foam wrapped in weather-resistant fabric — canvas, Sunbrella, or even repurposed drop cloths work beautifully. Stack two pallets for the base and one vertically for the backrest, securing them together with metal brackets for safety. Then layer your seat cushions with throw pillows in varying textures: a solid linen, a woven stripe, and a small embroidered or printed pattern. Stick to a two or three color palette to keep things looking cohesive rather than chaotic.
Style the area around your pallet sofa thoughtfully. A low wooden cable spool or a cinder block side table with a wooden plank top keeps the DIY spirit going while giving you functional surface space. Add a simple outdoor lantern or a potted succulent arrangement on the side table. Tuck an outdoor throw blanket in a wicker basket nearby for cooler evenings. The final result looks far more expensive than it is and photographs stunningly against a fence or garden backdrop.
4. Style a Budget Outdoor Dining Area with Mismatched Chairs
There is real charm in the unexpected pairing of mismatched outdoor chairs pulled together around a single table, especially when done with purpose. This approach is both budget-friendly and design-forward — it allows you to pick up individual pieces over time from thrift stores, yard sales, or curbside finds and unite them through a shared element like color, material, or texture. Paint is your greatest ally here. A coat of the same color in a matte or chalk finish across every chair instantly creates visual cohesion even if the silhouettes are completely different.

Choose your unifying color based on the mood you want to create. Soft sage green against a natural wood table feels like a French country garden. All-white chairs around a mosaic tile table lean Mediterranean. Black chairs in varying styles look sophisticated and editorial against a weathered wood tabletop. Once your chairs are unified, use the table setting itself to add personality — a simple runner in a natural linen or cotton, a small bud vase with wildflowers, and mismatched thrift-store plates that feel collected over time rather than purchased as a set.
Consider where you position your dining area carefully — ideally somewhere with partial shade during the hottest part of the afternoon. A shade sail stretched overhead in a neutral linen tone is one of the most cost-effective ways to cover a dining space while adding a sculptural, airy element overhead. String a few bistro lights above the shade sail for evening use, and your outdoor dining corner will feel like a destination rather than an afterthought. Meals eaten in this kind of setting simply taste better.
5. Create a DIY Fire Pit Lounge Area
A fire pit does not have to mean an expensive built-in structure. A simple steel bowl fire pit available at most hardware stores for around thirty dollars can become the anchor of a beautifully designed outdoor lounge space when you approach the area around it with intention. The magic is in the surround. Place your fire pit on a gravel pad to define its footprint and create a clean visual base. Then arrange seating around it in a loose, conversational circle — a mix of low Adirondack chairs, tree stump side tables, and even floor cushions on a weather-resistant rug.

The materials and colors you use around a fire pit should be warm and organic to complement the nature of the element itself. Think rust, terracotta, burnt orange, deep brown, and dusty cream. Layer a large outdoor rug in a faded tribal or geometric print under the seating arrangement, and add textural variety with a woven pouffe, a stack of firewood in a simple galvanized bin, and a few chunky pillar candles placed at different heights around the perimeter. These elements keep the space feeling alive and inviting even when the fire is not lit.
Lighting around the fire pit area after dark deserves careful thought. Rely on the fire itself as the primary ambient source but support it with small solar path lights embedded in the surrounding gravel and a few lanterns hung from shepherd’s hooks at the edges of the space. The layered glow creates a sense of enclosure and warmth that makes this corner of your yard the one everyone gravitates toward. Keep a woven blanket basket nearby for cool nights and you have created a year-round gathering place.
6. Transform a Fence into a Vertical Garden Wall
A bare fence is one of the most underused canvases in the average backyard, and turning it into a vertical garden is one of the most visually rewarding DIY projects you can tackle on a weekend. The simplest approach involves attaching wooden planters, repurposed gutters, or hanging pocket planters directly to the fence boards in a staggered, gallery-style arrangement. Vary the heights and sizes to create visual rhythm and fill with a combination of trailing plants, compact herbs, and low-maintenance succulents or air plants. The effect is lush and layered without requiring a large footprint of ground space.
![]()
Color coordination between your planters and the fence itself gives the display a more polished, considered look. If your fence is a warm cedar tone, choose planters in black metal or terracotta to contrast. If your fence is painted white or gray, go wild with colorful glazed ceramic pots or whitewashed wooden boxes for a breezy, bohemian feel. Back the arrangement with a trellis panel and train a climbing vine across the upper portion — fast-growing options like sweet potato vine or black-eyed Susan vine add height and drama within a single season.
Consider what you want the vertical garden to do for you beyond aesthetics. Culinary herbs like mint, basil, parsley, and chives are perfect for a kitchen garden wall near the back door. If you want fragrance, lavender, rosemary, and lemon thyme are beautiful and practical. Pollinator-friendly flowers like calibrachoa or petunias in trailing varieties add color and bring butterflies and bees into your outdoor space. With a drip irrigation system made from repurposed bottles, you can even make watering largely hands-free. This is truly a project where creativity and function intersect beautifully.
7. Build a Simple Pergola with Fabric Draping
A pergola does not need to be an elaborate structure to make a dramatic impact on your outdoor space. Even a simple four-post frame built from basic lumber and secured with metal brackets can completely change how a patio or backyard corner feels — suddenly there is a ceiling, a sense of enclosure, and a focal point that draws the eye and invites you in. For a budget build, use four-by-four cedar or pressure-treated posts and two-by-six crossbeams in a straightforward rectangular grid. The proportions matter more than the complexity of the build, so take time to measure and space things evenly before you commit.

The real personality of a budget pergola comes from what you do with the frame after it is up. Outdoor curtain panels in a sheer linen or weather-treated cotton draped from the crossbeams instantly add romance and softness to what would otherwise be a utilitarian structure. Choose a color that works with your outdoor palette — unbleached natural linen, soft white, or dusty blush all photograph beautifully and age gracefully in outdoor conditions. Tie them back loosely with a jute rope or a strip of torn fabric for an effortless, unfussy aesthetic that still looks considered.
Introduce climbing plants at the base of your pergola posts to blur the line between the built structure and the garden around it. Jasmine, wisteria, or climbing roses will weave their way up naturally over one or two seasons, giving your pergola a sense of permanence and romantic overgrowth that no amount of purchased decor can replicate. In the meantime, hang a couple of trailing pothos in macrame planters from the crossbeams to add greenery immediately. Add string lights across the top grid and a simple outdoor daybed or swing underneath, and you have created an outdoor room that feels like a true destination.
8. Design a Charming Pathway with Stepping Stones and Ground Cover
A well-designed pathway does more than guide foot traffic — it creates visual structure and gives your outdoor space a sense of intention and flow. DIY stepping stone paths are among the most budget-friendly ways to add this kind of architectural grounding to a yard. You can purchase basic concrete pavers from a hardware store for well under a dollar each or make your own using a simple mold, concrete mix, and decorative impressions from leaves or mosaic tile fragments pressed into the surface before curing. The handmade option adds a uniquely personal, artisanal quality that store-bought options simply cannot match.

Spacing and edging are what make a stepping stone path look designed rather than random. Place stones at a natural walking pace — roughly eighteen to twenty-four inches apart — and stagger them slightly for a less formal, more garden-inspired feel. Fill the gaps between stones with creeping thyme, Irish moss, or chamomile — ground covers that stay low, handle light foot traffic, and release a gentle fragrance when brushed. These plants are inexpensive, spread on their own over time, and add a lush softness that makes the path feel like it grew there naturally.
Border your pathway with low edging to give it definition and keep the surrounding lawn or mulch from encroaching. Simple options include galvanized landscape edging for a clean, modern look or small rounded stones or bricks set on their sides for a more cottage-garden feeling. Plant low ornamental grasses, lavender, or boxwood spheres along the sides to create rhythm and repetition as the eye travels down the path. When lit at night with solar path lights every few feet, this simple addition transforms your whole yard into something that feels far more considered and complete.
9. Set Up a Budget Outdoor Movie Night Space
An outdoor movie setup is one of those ideas that is genuinely simple to pull off but looks incredibly impressive when done with even a little visual care. At its most basic, all you need is a white sheet or a simple projector screen hung between two posts or draped over a fence, a budget-friendly projector, and a Bluetooth speaker. But with a few extra styling choices, this setup can become one of the most photogenic and talked-about features of your backyard. Start with the screen — a seamless white cotton sheet stretched taut between two wooden stakes or PVC pipes gives a clean, crisp projection surface and costs almost nothing.

The seating arrangement is where the atmosphere really takes shape. Layer an outdoor rug on the grass as your base, then pile it with floor cushions, poufs, and blankets in warm, earthy tones — think rust, mustard, cream, and faded olive. Mix in a couple of low folding chairs or wooden pallets laid flat on the rug for guests who prefer something firmer. The layered, casual seating creates a communal, festival-like energy that feels warm and fun without requiring any permanent furniture. Keep a basket of extra blankets nearby for when the evening temperature drops.
String lights overhead — either in a canopy formation or simply draped through nearby trees — frame the screen and add an ambient glow that does not compete with the projection. Set up a small snack station on a folding table off to the side: a tin bucket of popcorn, a cooler of drinks, and a few candles in glass jars. This is the kind of space that photographs like a lifestyle magazine spread but comes together in an afternoon. It is also endlessly repeatable — rearrange the cushions, change the blankets, and it feels fresh every time.
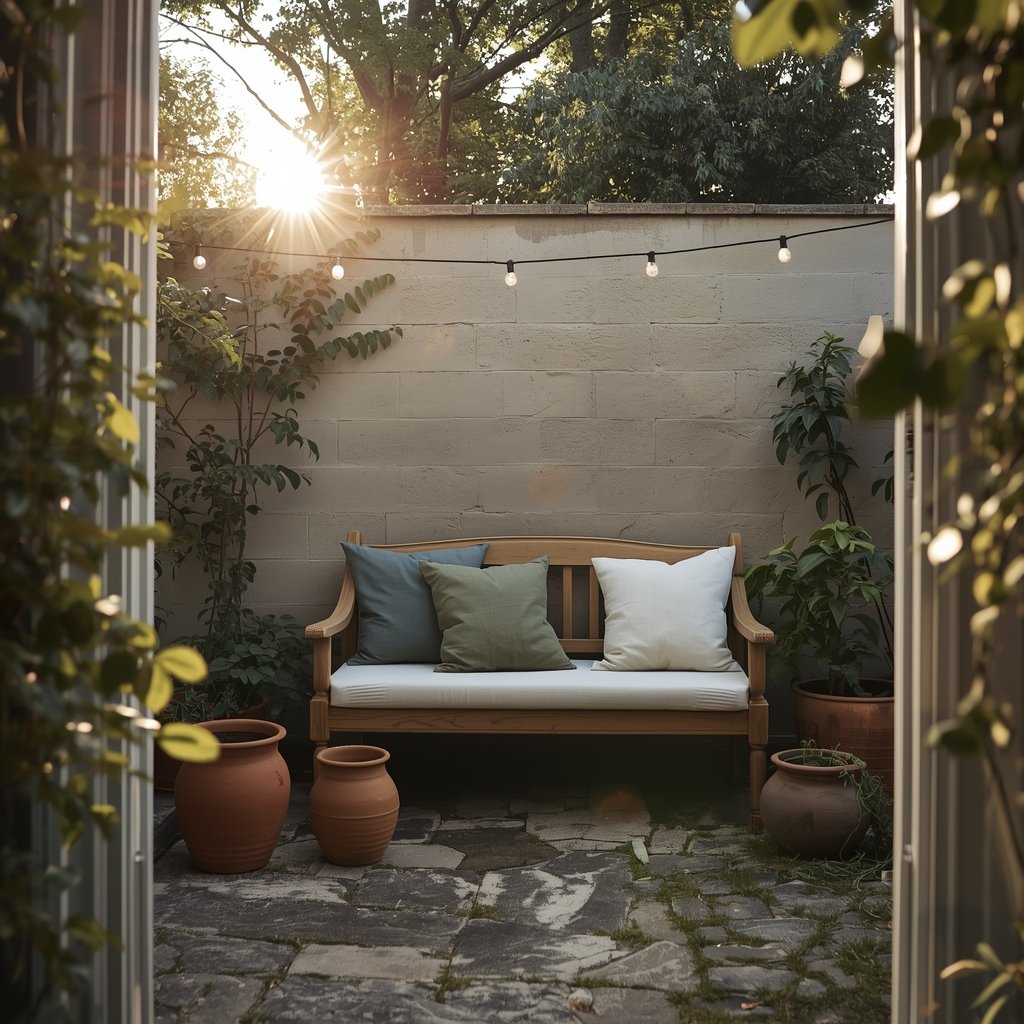
10. Create a Meditation or Reading Nook in a Garden Corner
Every outdoor space benefits from at least one quiet corner — a spot designed not for entertaining but for solitude, stillness, and restoration. Carving out a simple garden nook requires very little space and even less money, but the payoff in daily quality of life is significant. Start by identifying a tucked-away corner of your yard, ideally one with some natural shade from a tree or fence overhang. This is where the nook will live, slightly removed from the main activity areas of your outdoor space, defined just enough to feel intentional.

The foundation of a good garden nook is a single comfortable seat and the sense of being gently enclosed. A simple curved garden bench in wood or wrought iron works beautifully, as does a hammock chair hung from a sturdy tree branch or a freestanding frame. Surround it with container plants at varying heights — tall ornamental grasses or bamboo at the back to create a sense of a living wall, mid-height flowering perennials in the middle, and low trailing ground cover at the base. This layering creates an organic privacy screen that grows more beautiful over time without requiring a fence or structure.
Personalize the nook with small details that make it feel like yours. A simple wooden side table with a waterproof tray to hold a candle, a small journal, or a cup of tea. A wind chime hung from a nearby branch. A small bird bath or water feature nearby for the gentle ambient sound of moving water. Choose cushion and pillow fabrics in faded, muted tones — dusty pink, sage, worn denim, or faded stripe — that look softer and more inviting as they naturally weather over the season. This is the kind of corner that becomes the most-loved square footage of your entire home.